Original desk
Over the last months, I’ve been quietly creating my art studio. I’m wanting to bring art back to the fore of my creative business now that my poetry collection manuscript is completed.
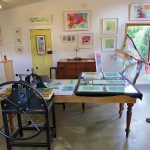
I’ve been loving doing this so much! My art studio is a large room in my home which was once my kids’ playroom. It has a view of our lovely back garden and the sky and it’s peaceful.
I first planned to set the room up for the kids to watch tv and game in but they like gaming in their bedrooms. So, I thought, mama deserves a playroom all of her own and the thought stuck.
I’d always wanted an art studio and, to be honest, I ain’t getting any younger. I’m 45 and I’m making my best life now – not someday. And my best life includes an art studio.
Pin It!
I’ve been having a lot of fun collecting things for my art studio: paints, brushes, canvases, shelves, woven baskets, pot plants, teacups, and a piano! I even collected a heavy wooden desk.
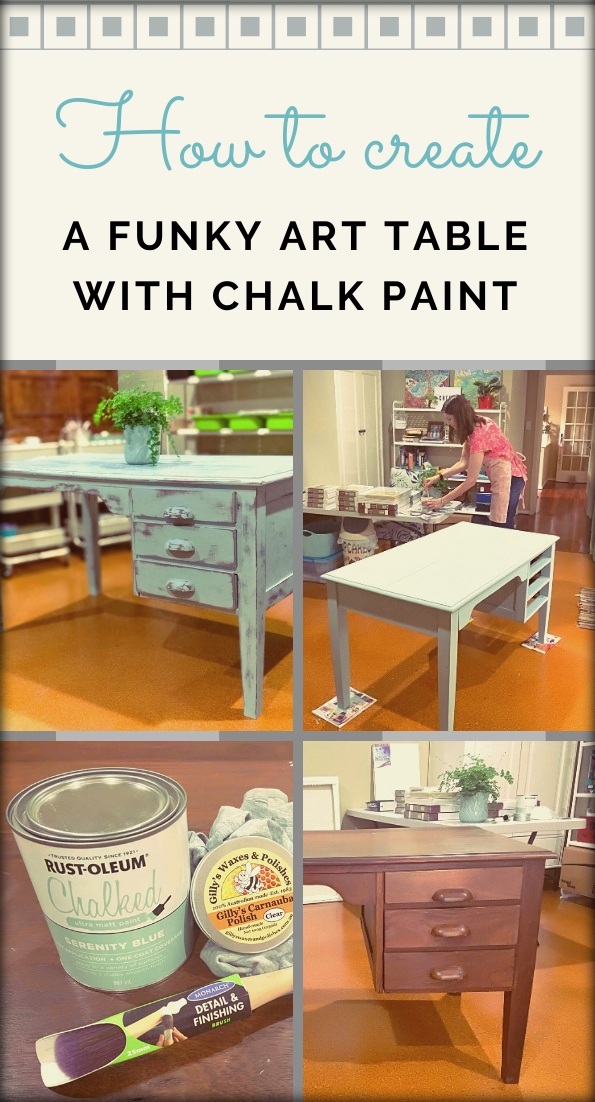
A little while ago, I received my father-in-law’s old desk and although it’s a bit dull, I saw its potential: Maybe a coat of chalk paint will give it a new life as my art table!
I want to scale down the size of the paintings I do so I can create plenty of art without stressing my hands out (as I have Marfan syndrome). The desk isn’t big so it’ll remind me to work smaller.
You too may like to splash a couple of coats of chalk paint on an old table and make it your own. A place where you can paint or write or do something that’s uniquely creatively you!

Chalk Painting Supplies
I didn’t need many supplies to create an entirely new look for the table. The supplies cost me just under $100 but you could do it cheaper if you shopped around.
I sourced most of my supplies from Bunnings simply because it was my first-time chalk painting and Bunnings is my local DIY hardware store and thus easily accessible.
There are lots of fantastic chalk paint designs and colours however Bunnings, surprisingly, offered limited colours and brands (only Rust-oleum and Dulux).
I chose the paint for the colour, not the brand, and because it’s non-toxic and has a matt finish. Some supplies you may already have at home or you may be able to borrow from family or friends:
- Rust-oleum Chalked Ultra Matt Paint: Serenity Blue 887ml
- Monarch Detail & Finishing Brush 25mm
- Gilly’s Carnauba Polish Clear 100g (125ml)
- Uni-Pro Cork Sanding Block PC100
- Flexovit 230 x 280mm 240 Grit Furniture Sanding Sheets
- Paint Partner Dust Masks – 10 pack
- Selleys Sugar Soap 1L
- Willow 11L Bucket
- Household Sponge
- Cloths (eg. old t-shirt cut up)
- Screwdriver or knife (for opening the paint can lid)
My fav thing: Loved the paintbrush big time! Lots of control.
My least fav thing: Maybe the polish. Easy to use but smells strong. Wonder if there’s another type that’s friendlier on the nose.
*Please note: I’m not affiliated with Bunnings or any of the products mentioned.
Buy Linda's Art!
Chalk Painting Process
The whole chalk painting process took me two days or about 12 hours. That’s with some fussing and doesn’t include the time it took to purchase supplies.
Step 1 – Cleaning
I cleaned the desk using a sponge, sugar soap and warm water in a bucket. Instructions on how to use sugar soap can be found on the back of the bottle.
I cleaned the desk twice with the damp sponge because the first wipe-down produced filthy water. There isn’t any need to sand the table before applying the chalk paint which is a big plus.
If you do choose to sand your furniture back before applying chalk paint, be sure to wear a mask to prevent any fine and potentially dangerous particles from being inhaled.
It’s best to sand outside if you can or if you’re inside, vacuum the dust away as soon as possible. *Don’t sand near children or pets.

Step 2 – First Coat
The first coat of Rust-oleum Chalked Ultra Matt Paint: Serenity Blue went on with my favourite paintbrush. Because of its ergonomic grip and round shape, it was easy to manoeuvre.
I got stuck right into the painting like it was a great adventure. I didn’t want to be precious with my brushstrokes because I was going for a vintage look which often features imperfections.
I started on the left front leg of the art table and worked all the way around, clockwise. That meant sitting on the floor, kneeling, and bending down low. I lay on the floor to paint the underparts.
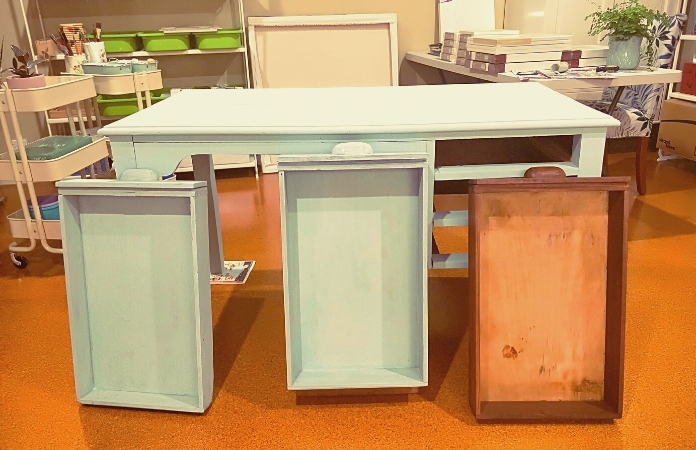
The three long drawers, I’d pulled out and put to one side, were on my to-do list for later. I decided early on that I’d paint all the underparts of the art table even though these aren’t readily observed.
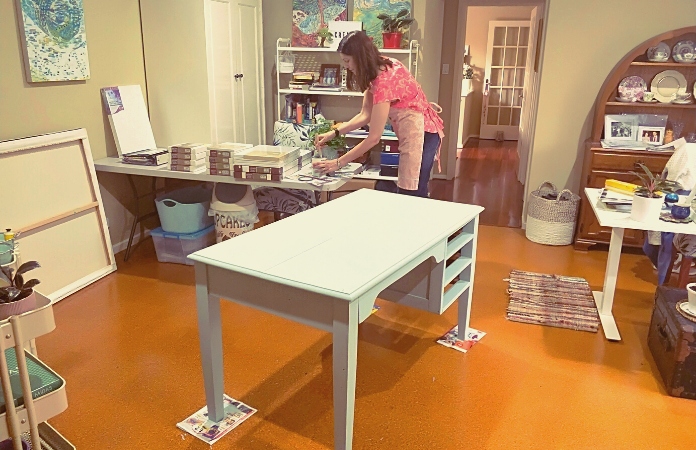
After I’d given the tabletop a once over, which completely changed the look of the table, I did the same for the drawers, including inside the drawers. I painted everything but their underside.

Step 3 – Second Coat
What I like about chalk paint is it dries quickly so you don’t have to wait long between coats. The instructions on the can say to wait 2-4 hours.
What I don’t like about chalk paint is it dries quickly so you may get streaky or patchy brush strokes, especially when it’s a warm day, which it was.
The second coat went on like a dream for all parts of the art table, including the drawers, except for the tabletop. These brushstrokes went in one direction.
Because the tabletop received the glare of the ceiling lights, I noticed an unevenness in the colour. It appeared more opaque or transparent in places. Yikes! I didn’t like this. It poked at my eye!
So the next day I applied a third, thicker coat of chalk paint only to the tabletop, hoping to get a better finish. Result: less patchiness but still a bit patchy … enough to bug me.

Step 4 – Sanding
I did what any brave Virgo would do and after a coffee break, took the sanding paper, wrapped it neatly around the cork block and went a little crazy (whilst praying that I didn’t stuff it up).
The purpose of sanding following chalk painting is to give the furniture a bit of a vintage feel. Sanding some of the chalk paint away will give it personality – like the art table has a story to tell.
I didn’t overthink the sanding; there was no grand plan. I simply went with my feels and sanded back some of the chalk paint on the tabletop first, to smooth the brushstrokes, and then all over.
I ebbed and flowed with the sanding block and the table, producing clouds of dust and from the merry dance produced a new creative wonder: my art table!
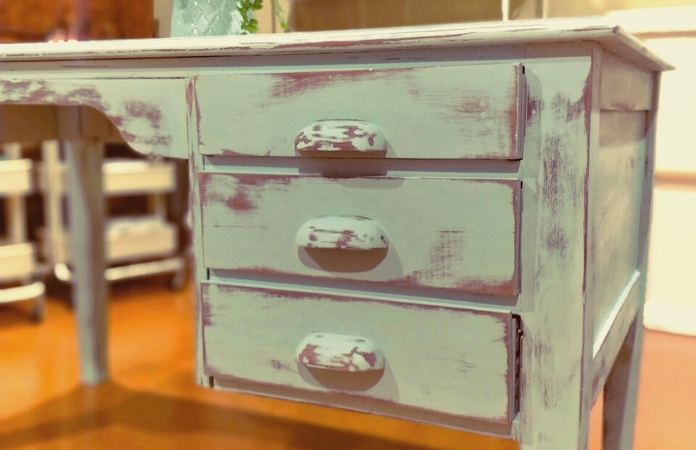
I gave particular attention to sanding back around the edges of the furniture. I like the drama of the distressed features and contrasting colours, the brown wood showing through the light blue paint.
The streaks and patches went away with the sanding and I got some fantastic effects all over the art table. If you sand back too much or to your liking, fear not, you can always paint over it and try again.
*Please note: I wore a dust mask and kind of frantically vacuumed myself, the floor and the table whilst sanding. The room was well-ventilated.
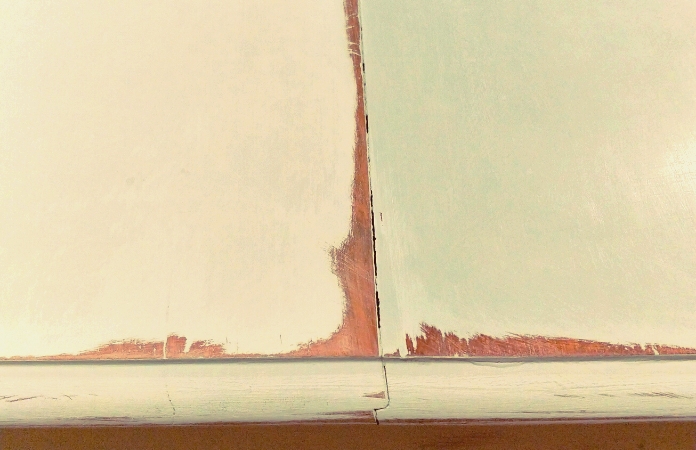
In this photo, only the right side of the art table has been waxed
Step 5 – Waxing
By the time it came to waxing with Gilly’s Carnauba Polish Clear, a fast-drying surface polish rich in carnauba wax and beeswax, my right arm had had a thorough workout.
Initially, I used a clean old sock to polish the tabletop with wax. With my fingers inside the sock, I dabbed the soft wax sparingly and rubbed it into the furniture.
Almost immediately after applying the wax, I buffed it back with another clean old sock. When these socks lost their effectiveness, I cut up an old t-shirt and applied the same process.
I waxed the entire art table, including the drawers. Following this, I returned the drawers to their rightful place, in the table. And wa-lah, magic happened. Beauty was born!
It was intriguing to see the paint colour and the surface texture develop from waxing the dry chalk paint. That and the intense smell of the polish put me on a happy high note.

Chalk Painting Rocks!
In conclusion, I’d rate chalk painting a wholly satisfying creative experience. I will do it again, for sure, my next project being a cabinet in my art studio, which stands behind my office desk.
In merely two days, I was able to completely transform an old piece of furniture into something that feels artsy and uniquely me. The table has become a feature of my art studio.
I want to sit at it and do my art-making. It would be wonderful for you to feel extra inspired by your creative space and it’s certainly worth the effort it takes to create a special table for yourself.
I wouldn’t change a thing about my first chalk paint experience. I so enjoyed it, I even painted a couple of worn Ikea stools with the leftover paint; they are now my funky art studio seats!